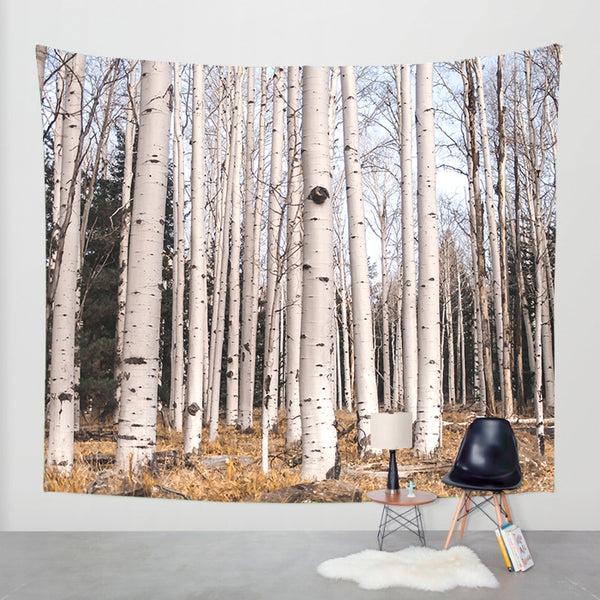
You've picked out the perfect wall tapestry, you've cleared a spot on your wall, and then you have literally no idea what to do next. How do you get that beautiful drape from your hands to the wall so can have your insta-worthy moment beneath it? We're here to answer your SOS! Here's a step by step guide to three easy and creative ways to hang that baby up. Have more ingenious ways to decorate with wall tapestries? Comment below!
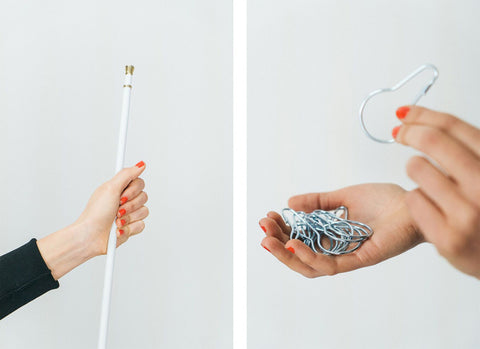
Rod

Step 2: Get your tapestry. Measure and cut 1 inch long slits across the top, like a shower curtain.
To choose how far apart your want your slits to be, take the full length of the tapestry and divide it by a number that gives you a whole numbered result.
For example, if the tapestry is 60 inches long you could make slits 5 inches apart and there would be 12 total. OR if it's 104 inches long, you could make slits 8 inches apart and there would be 13 total. Find what works for you!
Tip: to ensure perfection, use a white colored pencil or thin sharpie to make dots on the tapestry where you plan on cutting. And don't forget to make cuts as close to each end as possible, otherwise you'll have unwanted extra hanging off the sides. AND make sure you cut far enough away from the top that there's no chance of the rings pulling through!
OH, if you don't want to cut your tapestry we feel you. Do the same measuring process, but instead of cutting slits, clamp down binder clips. You can use their looped end to slide onto the curtain rod.

Step 3: Link shower curtain rings through each of the slits.
Step 4: Slide the rings onto the curtain rod.
Step 5: Hang the rod on the brackets, spread out the tapestry, and enjoy!
Rope

You'll Need:
Wall Tapestry
Rope
Scissors
2 Large Screws
Drill
Step 1: Measure out the length of your tapestry, and drill screws into the wall at the desired distance.
Step 2: Measure and cut slits across the top of your wall tapestry. See "Step 2" above for detailed instructions on how to get this exactly right!
Also, keep in mind that you'll need to cut the slits big enough for your rope to slide through. If you've got thin rope, cut short slits, if you have thick rope, cut longer.
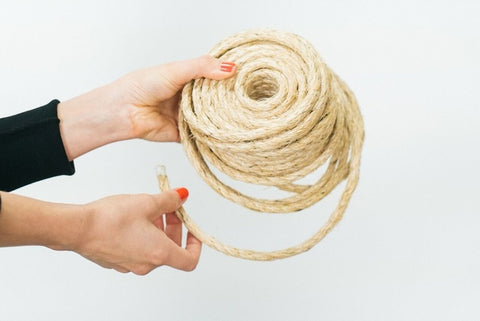
Step 3: Cut the rope to your desired length. Make sure to leave extra on each side, at least enough to tie a decent double knot.
Step 4: Weave the rope through the slits basket-style! When you start, make sure you account for the amount you want to have left over on each side, that way, when you get to the other side it'll be close to even.
Step 5: Tie the extra length of rope around the large screw in the wall. Do this for both sides. A double knot should hold, just make sure the screw head is big enough that the knot won't slide off, et voila! You've got a super cute, rustic-style wall hanging.
Voila!!!
Tack-Up a.k.a. Ain't Nobody Got Time 4 This DIY Life
You'll Need:
Wall Tapestry
Hammer and Nails OR
Screws and a Drill
Step 1: Mark on the wall where you want the top of tapestry to hang from. Basically, just make small pencil lines on the wall about the width of your tapestry.
Step 2: Hold one end of the tapestry over a marked spot and nail or screw into the wall over the tapestry.
Step 3: Stretch it to the other side and repeat step 2. (You can add a nail in the center if you wish, but our tapestries are so light 2 nails should do the trick.)
Step 4: RELAX AND ENJOY! Or maybe actually go do something with your life since that took literally no effort.
Photos by Jonathan Chu.